How to Draw a Car
In this tutorial on how to draw a car we will show the basic principles, methods and tips for sketching any brand, model, and type.
Our site is called DrawCarz and here we show how to illustrate vehicles, both the most simple cars and supercars of the highest class.
This tutorial is perhaps the most important on our site, as the principles and basics it explains are essential and can be applied to sketching any automobile.

How to draw a Car: step-by-step tutorial
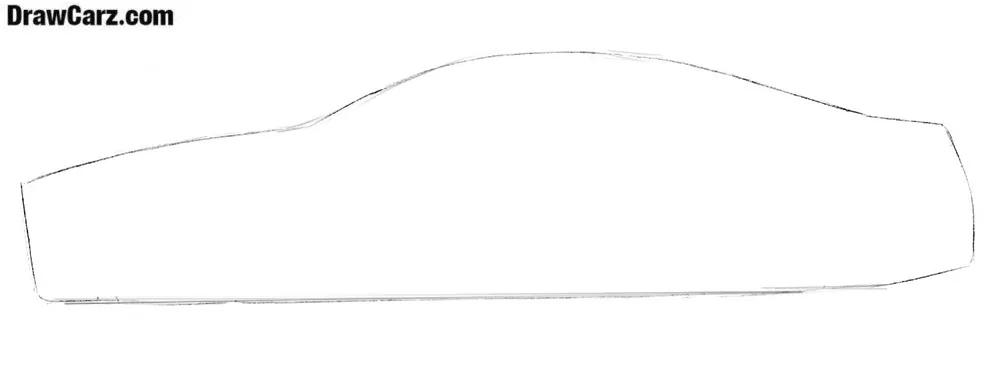
Step 1: Draw the basic shape of the car body
Let’s start with a sketch. Work very roughly (within reasonable limits). At this stage, neat lines aren’t necessary so you have room for corrections if you make a mistake. Sketch the contours with very light, general lines. Here you’re blocking in the proportions and overall silhouette.
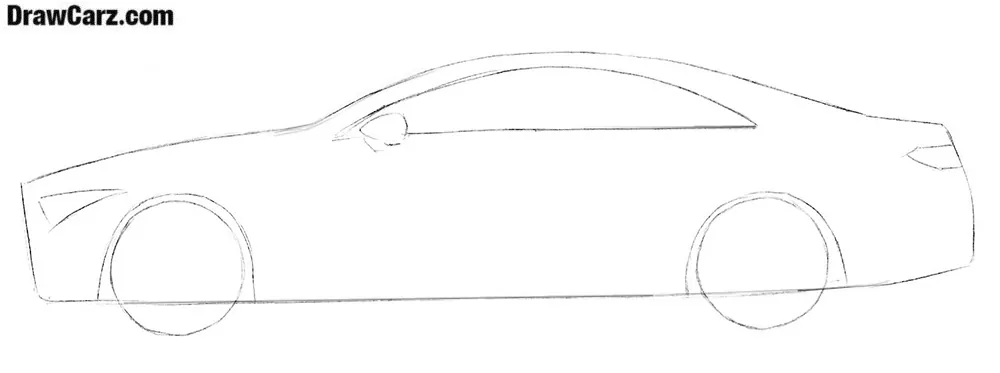
Step 2: Sketch the details with rough lines
The approximate shape is drawn, but the draft doesn’t yet look like a vehicle. To fix this, design the most basic features. With contour lines, mark the windows, headlights, and wheels. Details vary by model, but their placement is generally similar. You’re establishing the functional zones of the design.
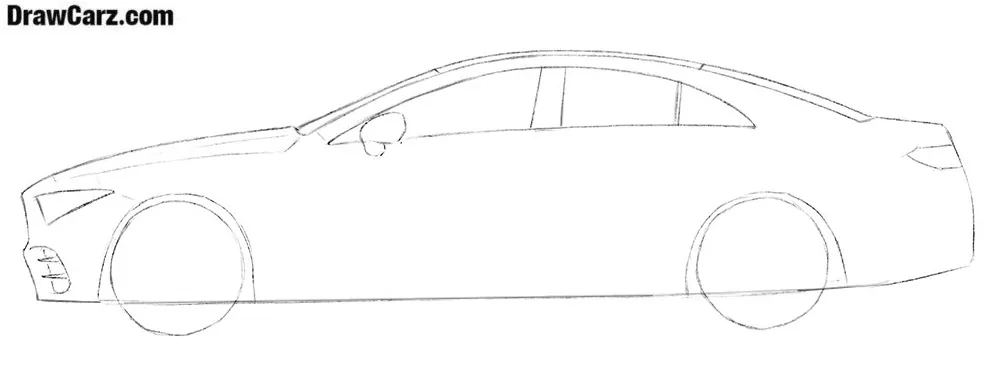
Step 3: Draw the front of the car in detail
From this step, work on details. Illustrate the hood and headlight. Trace the front and remove the auxiliary lines from this section. The front defines much of a car’s identity, so accuracy here can change the whole look. Cleaning up earlier guides makes the shape sharper and closer to a real automobile.

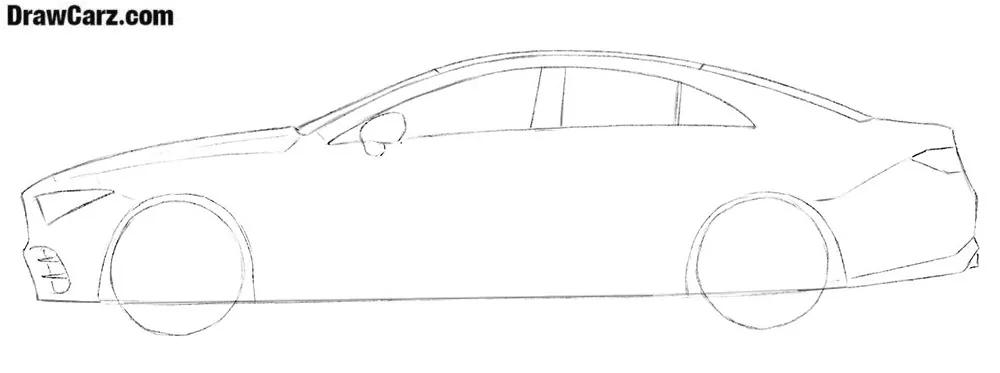
Step 4: Detail the roof and windows
Depict the roof as it smoothly transitions into the rear. Roofs differ greatly; in our example, it’s low and flat. After that, give the windows a more complete look, tracing and refining this area and deleting unnecessary construction lines.
Step 5: Detail the back part
Step five is dedicated to the rear. Draw the taillight and the exhaust pipe of the car. Render the taillight with simplified shapes—rectangles, ovals, or vertical strips, depending on style. The exhaust pipe, though small, is important for realism.
Step 6: Draw the car doors, handles, and mirror
For the doors, illustrate the panel separation lines with smooth strokes. Cars are very different, and their doors are also have diverse look. Add body lines and door handles (which differ by design), and sketch a side mirror.
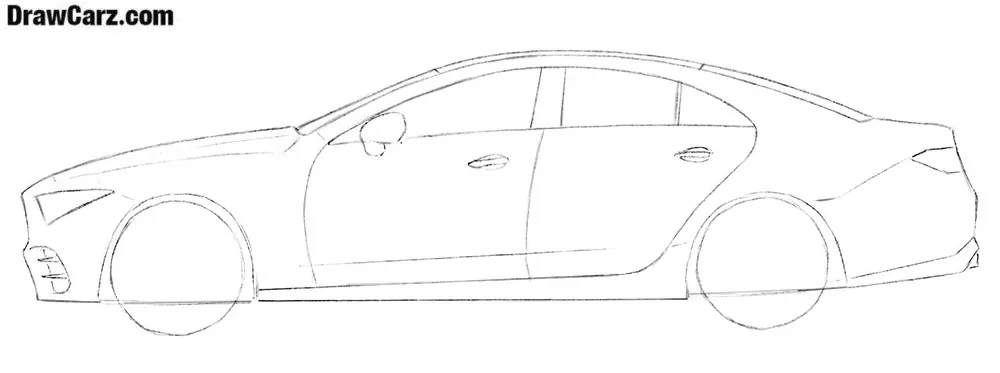
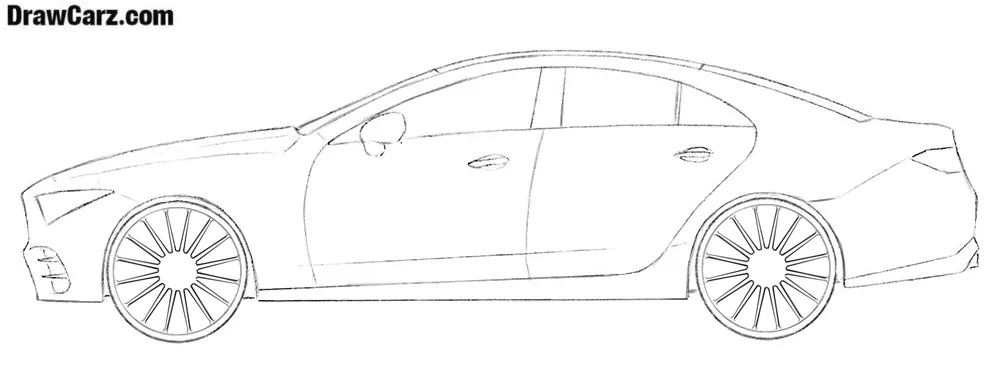
Step 7: Erase the guidelines and add the rims
Wheels are mandatory elements. They should be round and equal in size. To complete them, add rims inside the tire shapes. Start with concentric circles, then add a simple spoke or rim pattern. After erasing construction lines, the sketch moves from a rough draft to a recognizable, realistic vehicle.
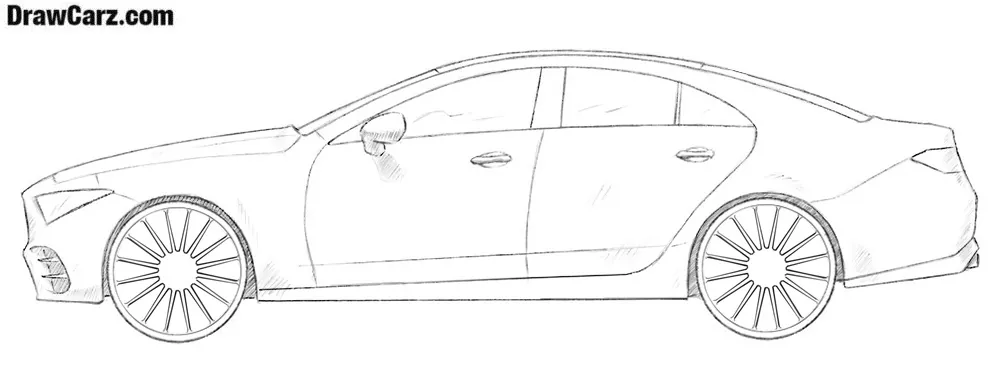
Step 8: Add shadows to the car drawing
The car drawing is almost complete; now add simple shadows. Use hatching to define volume: darker tones under the chassis, inside wheel wells, and below bumper edges. Keep upper surfaces lighter to simulate top light. Even simple gradients will make the form more three-dimensional and solid.
Car Video Tutorial
Car drawing fundamentals
The DrawCarz team has described the most basic principles and tips for vehicle sketching that can help with a variety of brands and models.
These methods are intentionally universal, so they apply whether you’re drawing a compact car, a classic vehicle, or a modern luxury model. The same foundation supports both quick sketches and more detailed design renderings.
This automobile drawing guide isn’t complicated, and once you master it, you can sketch a car of any brand.
If this advanced lesson feels too difficult, start with our easy car drawing tutorial, where we go through the process step by step with minimal details and no shading or highlights, keeping it as simple as possible.
As you understand, our site is about drawing different cars, so we create many vehicles based on this fundamental guide.
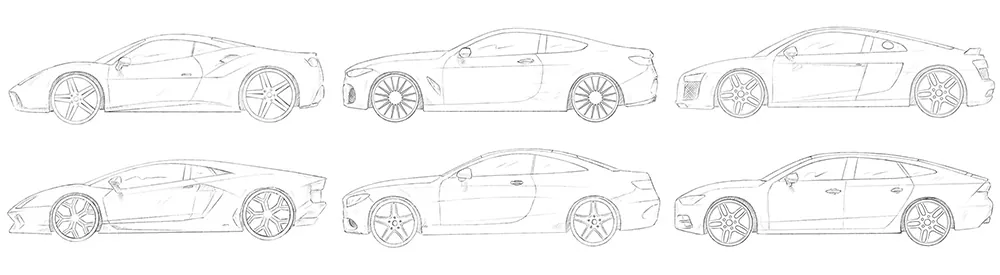
Features of illustrating vehicle body types
When sketching cars, it is important to remember that different body types have unique proportions and features.
These differences define the character of the vehicle and should be captured even in simple sketches. Although there are many subtypes, several main categories appear most often.
A sedan is the most common body style. It usually has four doors and a clear separation between the cabin and trunk.
A sports car stands out with a low stance, wide body, and aggressive lines. It often has two doors, larger wheels, and a roofline that sits very close to the ground.
An SUV or sport utility vehicle is larger, with higher ground clearance and a bulkier form. Its windows are taller, and the wheels appear smaller relative to the body.
A pickup truck combines a cabin in the front with an open cargo bed in the rear.
Knowing the proportions of different vehicles is essential for making your sketches more convincing. Try repeating the basic steps from this guide while adjusting details – such as fewer doors for a coupe, an open cargo bed for a pickup truck, or larger body elements for an SUV.
Perspective, volume, and color in automotive sketching
On this site, we show and explain the process of sketching different vehicles strictly from the side, but for clarity we decided to make additional lessons in which we depict this same car (in our example, a Mercedes-Benz CLS) from all sides.
Illustrating an automobile from multiple angles helps you understand proportions better and see how the design changes with perspective. Such practice is important for anyone interested in industrial design, or concept art.
Thus, soon there will be lessons about cars with top, rear, and front views. In addition, on DrawCarz.com you will learn how to draw individual parts of the interior and exterior.
And as you understand, we will show all these little things using the external and internal forms of the Mercedes-Benz CLS.
In addition, you can paint your car in your favorite color.
We love black on cars very much, but no one prevents you from using your imagination and painting your car in the color of hellfire or the color of the hip of a frightened nymph. So, if you want to draw the same way, then welcome to DrawCarz.com.


like the car
YOU ARE A … !!!!!
Thanks for the energy! Appreciate you checking out the lesson.
Glad you liked it!
HELPFULLLLLLLLL
Glad you found the tutorial helpful!
thnx a lot very elpful
Happy to hear that, Sally! Keep practicing your car drawings.
Helpfull
Thanks! I’m glad the guide helped you.
HI every one my name is Bad 2020 and i need help with my drawings so if there is a PROFESSIONAL DRAWER IN THIS CHAT PLEASE HELP ME!! Thank yo very much
i am a professional.
That’s great! Always nice to have experienced artists here.
Hi! There are many tutorials here you can follow. Start with the simpler cars from our For Beginners category and you’ll improve quickly.
Thank you need horses on this thing
Interesting idea.
This is
What?
Lol
cool
Glad you think it’s cool!
cool
super cool
Appreciate it.
All of the drawings have come out good besides my shakey hands. Your tutorials are very easy. Keep up the great work.
That’s great to hear! Keep going – steady lines come with time.
thats cool
Thanks!
Please give dimensions
?
Do you mean to make the lessons more voluminous?
hi
Hi there!
Thank you
You’re welcome!
Cool website maybe it will help me draw a car.
Thank you. Very nice to see the side was useful for drawing cars.