How to Draw a Car in Perspective
Most often we draw cars from the side, but in this tutorial, we will show you how to draw a car in perspective.
There are linear perspective and aerial perspective. The rules of linear perspective tell us that all receding parallel lines converge at one point.
The rules of aerial perspective tell us that the further away an object is, the less contrasting and darker it will be.
With that in mind, let’s get down to the guide to draw a car in perspective step by step.

How to car in perspective: step-by-step tutorial
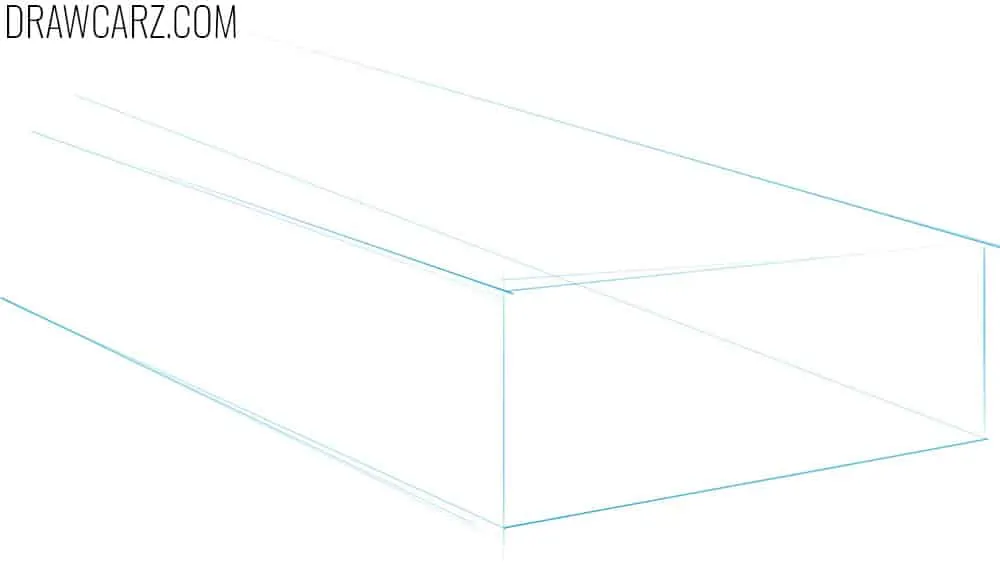
Step 1 – Set the vanishing lines to establish car perspective
To draw a car in perspective, you need to imagine it in the form of simple geometric shapes. Sketch constructive lines that represent the vanishing point. According to the rules of linear perspective, parallel lines should gradually converge as they recede into the distance. Imagine the car as a combination of simple geometric shapes placed in perspective. This will help maintain correct proportions for a 3D car sketch.
Step 2 – Draw the car roof contour reduced in perspective
Outline the roof with smooth, arched lines. Add the windshield contours at the same stage. Remember that parts closer to the vanishing point should appear smaller and shorter. The front part of the roof and windshield should be dark and contrasting.

Step 3 – Draw the car’s wheel arches considering perspective
Extend the roofline to form the rear of the car. Make the rear appear light and smooth. Sketch the wheel arches, making the closer one larger and more detailed, while the rear one is smaller and lighter. This difference is a key aspect of perspective drawing.

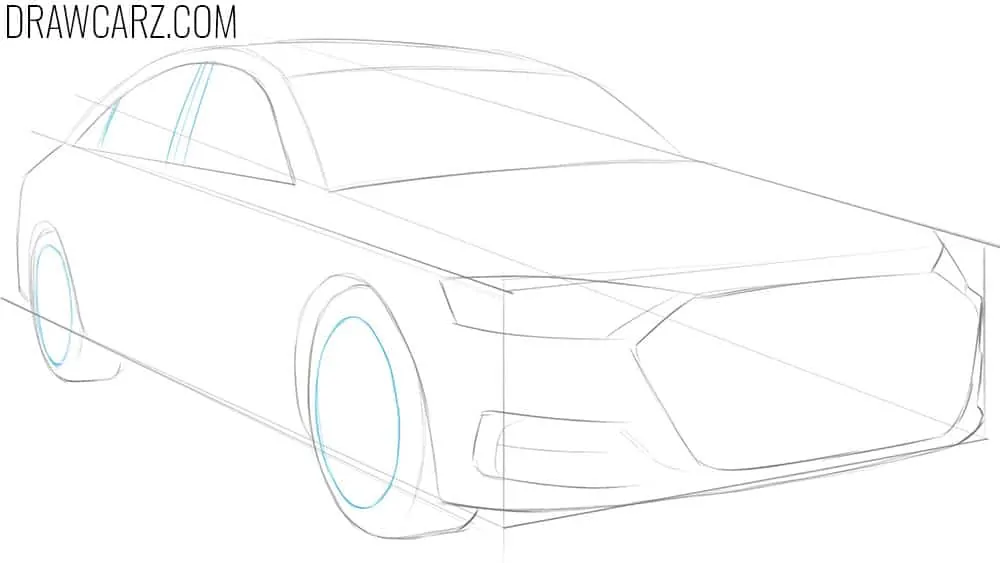
Step 4 – Indicate the headlights and side window
Using the perspective guidelines, add angular headlights at the front. Between them, sketch the upper part of the radiator grille or the front edge of the hood. These details should appear dark and smooth. Draw the window frame with a combination of straight and curved lines.

Step 5 – Detail the radiator grille and bumper
Continue refining the grille, then extend the lines downward to form the lower part. Add the bumper with a long, slightly curved line. Sketch the air intake below to complete the front design. Make the shapes of the front details dark and contrasting.

Step 6 – Sketch the perspective-correct wheel shapes
Inside the arches, draw the wheels as ovals adjusted to perspective. The front wheel should appear larger and darker, while the rear one looks smaller and lighter. To check accuracy, flip the drawing or view it in a mirror. If drawing an SUV, make the tires thicker; for a racing car, keep them low-profile.

Step 7 – Detail the greenhouse and shape the rims
Add the B-pillar to the window frame using straight lines. At the back, mark a short line for the rear window segment. Inside the wheels, sketch rims as ovals. The front rim outline should be noticeably larger than the rear one to reinforce the effect of perspective.
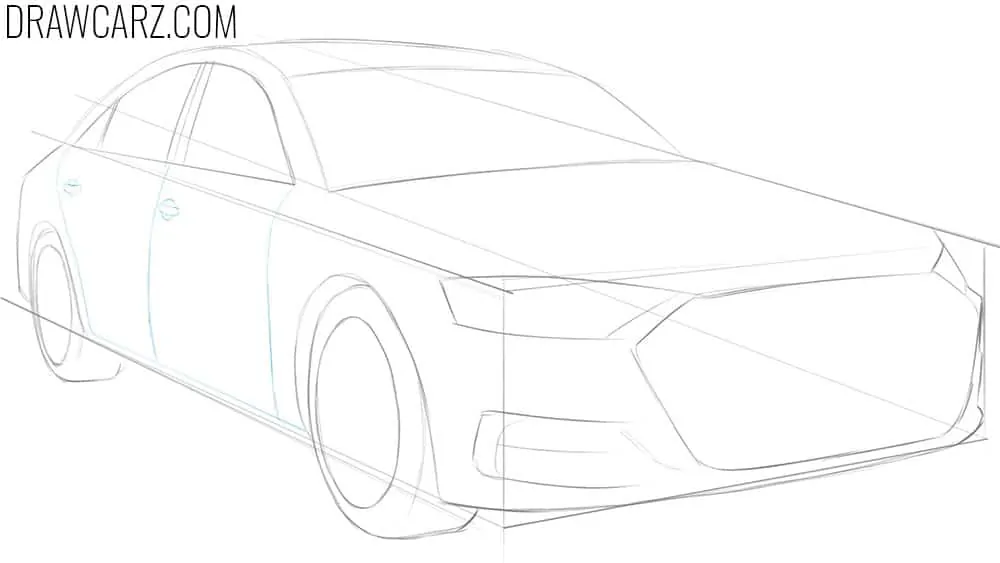
Step 8 – Draw the doors decreasing into distance
On the body side, outline the doors, making them gradually smaller as they recede into the background. Add door handles, keeping their sizes proportional to perspective. You can also add smooth decorative lines running along the side edge of the car.
Step 9 – Add the grille mesh rim spokes
In the rims, draw central hubs with spokes radiating outward. Make the front rim darker than the rear one to reinforce realism. On the grille, add mesh texture using intersecting lines. To make the cal look more dimensional, make the frond more detailed than the rear part.

Step 10 – Darken the near contours, lighten the distant outlines
Erase construction lines, then strengthen the closer contours with darker strokes. Leave the distant outlines lighter to create a sense of depth. This simple trick makes a linear and aerial perspective drawing look more dimensional.

Step 11 – Add shadows considering areal perspective
Start shading with the darkest areas under the car, in the wheel arches, on the bottom edges of the tires, and along the underside. Add lighter halftones on surfaces receding into distance. Place highlights on the glass to show reflections. According to aerial perspective, shadows and tones should be darker and more contrasting in the foreground and softer in the distance.

Further car drawing practice
This is one of the most distinctive lessons on our site, since most of the time we draw cars from the side view, but here we decided to show a completely different format and angle.
Drawing a car in perspective is an important exercise that will help you develop your vehicle sketching skills by giving the subject a more three-dimensional and volumetric look.
Before moving on, take a moment to carefully review your finished perspective drawing and study the result:
- Look closely at the wheels. In perspective they must appear as ellipses, never perfect circles. Their tilt and width should match the angle of the car’s position.
- Make sure the car remains symmetrical. Even though perspective distorts proportions, the left and right sides of doors, windows, and lights should correspond logically.
- Review the vanishing points. Every major line of the body should lead toward the same vanishing point or set of points, depending on whether it is one-point or two-point perspective.
- Check the wheel alignment. All four wheels must sit on the same ground plane, otherwise the vehicle will appear tilted or unstable.
- Verify the car’s contact with the ground. Tires should touch the ground evenly, and a light shadow beneath the car helps it feel grounded.
- Pay attention to overlaps. Fenders should overlap wheels correctly, and bumpers should cover or extend past the body in a way that looks natural in perspective.
- Finally, check the scale of small details. Headlights, door handles, and grille sections should gradually reduce in size with distance to maintain realism.
After completing a car in perspective, it’s important to decide where to move forward.
The best way to strengthen your foundation is to start with our main car drawing tutorial, where we cover the absolute basics of constructing a vehicle in the simplest possible way.
Once you are comfortable with the basics, you can try our easy car drawing tutorial, which is designed as a straightforward step-by-step guide.
For those ready to advance further, explore our realistic car drawing tutorial, where we introduce shading, reflections, and more complex detailing.
Take this perspective car as a milestone and keep pushing your skills further. Join our mailing list to get upcoming lessons on cars of every type, from simple step-by-step guides to advanced shading studies.
Pass this tutorial along to anyone who might enjoy practicing vehicles, and keep experimenting with different angles, styles, and details to make each new drawing more refined than the last.


Please can you post how to draw a car in perspective from the back
very smart he should do that.
Yes, agreed, that’s worth doing.
Good idea, a back perspective tutorial will be useful. We’ll add it soon.
can you make a formula car series
Hi Paul. Yes, we can make a tutorial on how to draw formula cars.