How to Draw a Car Seat
This tutorial on how to draw a car seat will be part of a series of lessons on different details, where in addition to the car seat we will sketch wheels, steering wheels, and the rest of the interior and exterior of vehicles.
Cars are the main and integral theme of DrawCarz. But as you understand, we show not only how to illustrate vehicles, but also their parts.
And anyone who wants to be able to draw cars should also be able to illustrate their parts, so let’s get started sketching the car seat!

How to draw a car seat: step-by-step tutorial
Step 1 – Sketch the seat backrest outline
First, mark the part of the chair that supports the back. You can make a more classic flat design or create a deeper bucket. A flat backrest communicates a more traditional or economy feel, while a deeper bucket shows lateral support, like you’d see in a sports coupe.

Step 2 – Add the seat base and headrest
Now sketch the lower portion, which can also be flat or contoured. Next, draw the headrest. In this step, the main thing is symmetry. Here you define the H-point and seating posture. The base should connect naturally with the backrest, and in a sporty version, the side bolsters wrap upward to hold the driver. The headrest should align with the centerline.

Step 3 – Draw the seams and interior stitching of the seat
Let’s draw the seat details. Illustrate the horizontal and vertical seams, which will give the seat volume and realism. Of course, among the endless variety of designs, you can choose any other at your discretion. Stitching defines surface tension and how the upholstery behaves under use. Consider adding double-stitching or contrast thread, which are common in luxury and performance interiors.

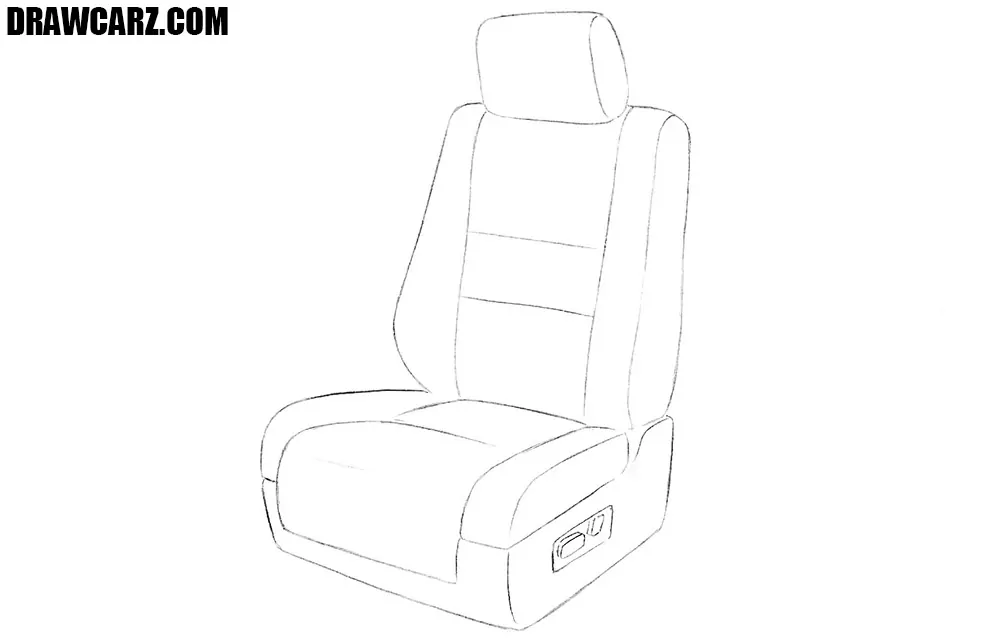
Step 4 – Trace the car seat and draw the adjusters
Now trace all outlines, stitches, and parts of the car seat, to make it realistic and clean. On the lower part, depict the seat controls. The outer silhouette should feel crisp. The stitching lines must follow the contour logically. Place the adjuster controls low on the seat base, indicating levers or electronic switches depending on the type of vehicle.
Step 5 – Create volume with highlights and shadows
Shadows drawn with the help of hatching will make your seat sketch look more dimensional and realistic. You can increase the number of shadows for greater realism. Use hatching to show foam density and upholstery curvature. Stronger highlights along edges can convey leather or vinyl textures.

Car seating design fundamentals
Cars appeared more than a hundred years ago, and during all these years, the design of seating has changed and improved.
They introduced various technologies that made them more comfortable, more modern, and more useful. Features like adjustable lumbar support, integrated airbags, heating and cooling systems, and even memory settings all influence the way you might represent details when sketching different types of seats.
In this tutorial, we showed in five steps the most important points. Use this guide to learn how to sketch a wide variety of seating options. Illustrate them separately or as part of the interior.
Sketching different seating types
Older cars often used bench layouts instead of separate buckets. To sketch these, simplify the overall shape into a wide rectangular form with minimal side bolstering. Keep the backrest flat and add simple horizontal stitching or a few buttons to indicate older upholstery styles.
Sports cars and many modern sedans use contoured bucket seats. When sketching these, exaggerate the side bolsters on the base and backrest, showing how they wrap around the driver for support.
Add headrests that extend from the backrest, and include detailed seams to highlight premium materials.
Drawing the rear seating of a vehicle is different from a front row. Use a wider base with three headrests and less pronounced bolstering.
Add folding lines or seams that convey the ability to split the bench for trunk access. Proportions should feel broader and flatter compared to the front.
High-end vehicles often have thicker cushions, softer curves, and visible stitching patterns. To sketch these, convey smooth surfaces, subtle padding lines, and maybe even perforated textures in the center panels.
For racing-inspired designs, sketch more aggressive side bolsters, integrated headrests, and cutouts for harness belts.
Once you practice them separately, you can move on to sketching seating as part of a full interior, adding perspective, dashboard elements, and other surrounding details for a more complete composition.
For example, a good next step is to try drawing a sports car with an open roof, where the interior becomes visible. In this case, you can sketch the seats as part of the whole composition.
And if you enjoy our drawing tutorials, make sure to follow us on social media. There we regularly share new step-by-step guides, updates, and additional materials that can help you improve your car sketching skills.

damn f*#@ing nice
Thank you so much! =)
thank you
You’re welcome.
thank you stranger
Glad this drawing tutorial helped.
wesley
hildale
Thanks for stopping by.