How to Draw a Honda Civic
In this tutorial, you will learn how to draw a Honda Civic step by step. This popular compact car is one of the most recognizable on the road and among the most noted hot hatches.
Honda is known for building some of the best performance hatchbacks on the market.
What is a hot hatch? It is a car that looks cheap but at the same time is an expensive car that drives very fast and cool.
The goal here is to convey the most important features that define the Honda Civic and set it apart from other vehicles and performance hatchbacks.

How to draw a Honda Civic: step-by-step tutorial
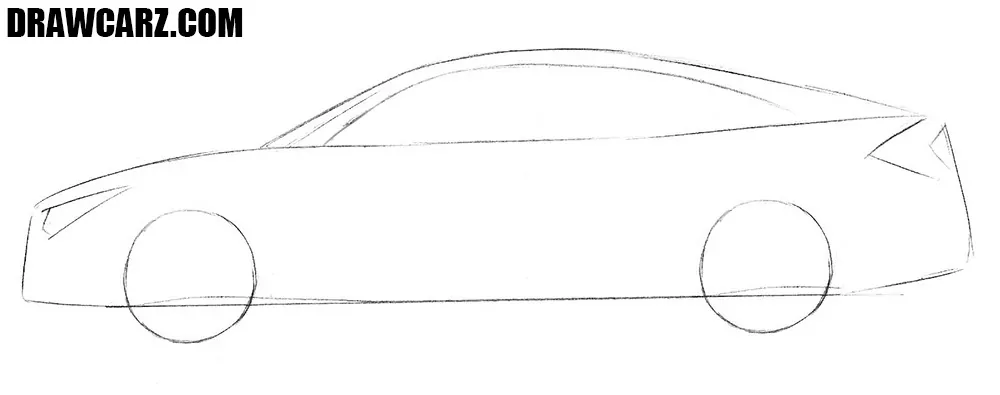
Step 1 – Sketch the smooth hatchback body outline
The body of this car is very standard for any hatchback, that is, fairly smooth with a sloping back. To display this as a loose sketch, we’ll use very light lines. At this stage, it is important to set the overall proportions. Since this is only a base sketch, make the strokes light.

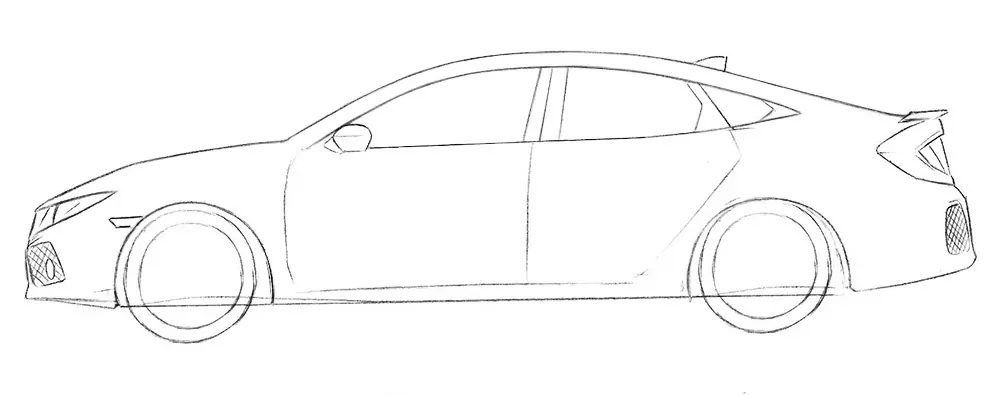
Step 2 – Sketch the Civic’s wheels, unique lamps, and window line
In our opinion, the Honda Civic is a car that by all means tries to look unusual. This is expressed in the lights and the window line. Let’s display these details and round wheels. Now, draw two circles for the wheels of your Honda Civic, trying to make them symmetrical. The headlight should be narrow and angular. The window line must follow the shape of the roof.
Step 3 – Complete the main Civic body features
Details of the third step look more usual (apparently Honda did not think up how to distort the doors and wheels). Anyway, let’s sketch these detail using very lights lines. First, set the shape of the doors with long, straight vertical and horizontal lines. Add a suggestion of the wheel arches around the circles of the wheels. The bumper details should also be lightly indicated in this step.

Step 4 – Finalize the front section with dark lines
To give your Honda Civic drawing a finished look, we will use dark pencil lines. Detail the front of the Japanese hatchback and indicate the front lamps and air intakes. Work carefully on the headlight, tracing it with clear outlines, trying to replicate the real-world shape. Next, sketch the air intake opening with more detail.
Step 5 – Draw the roof and unusual window structure
As we said above, the windows of this hatchback are quite unusual, primarily because of the large number of parts. In this step, we will deal with the fact of drawing all these details of the Honda Civic. Begin by tracing the roofline smoothly. Divide the side windows into sections: the front window, rear passenger window, and the small triangular panel near the C-pillar.

Step 6 – Add the intricate rear lamps and trunk lines
The back of the Civic looks even more unusual and ornate than the front. Let’s draw all these intricate lines of tail lamp and trunk of the Honda Civic. Clean up the picture with an eraser. Carefully outline the taillight, giving it detailed and finished appearance. Make sure to capture their angular shape, as this gives the Civic its unique character.

Step 7 – Draw the doors of your Honda Civic in detail
As we said at the third step, the side part of this hot hatchback looks quite ordinary, so let’s detail the doors and handles, as we show in the picture below. Refine the door contours, making them more defined and connected smoothly to the window frame. Add the handles as small horizontal rectangles positioned just below the window line. Also, trace the side mirror more clearly to complete the side profile.

Step 8 – Draw the rims with Civic’s unusual design
The rims in this picture look quite unusual, but not difficult. Repeat all lines as in our drawing or use rims design from our other guides, for example from articles about drawing a Ferrari or our BMW M5 drawing tutorial. If you prefer, you can experiment with simpler five-spoke rims for an easier version.

Step 9 – Finalize your Honda Civic adding shadows
Whatever details we draw, the drawing will not look realistic and natural until we draw shadows and highlights. In the picture below we showed how to do it. Repeat this with hatching. Add shading beneath the car body, especially under the bumpers and wheel arches. Shade lightly below the mirror, to make it dimensional.

Honda Civic and hot hatchback design features
So, at the beginning of this tutorial we introduced the term hot hatch or hot hatchback, and we hope that during the process we managed to show how to sketch one step by step.
Now that you’ve completed all the stages, it’s worth pointing out some additional details that define this body type.
The most important aspect of a hot hatchback is its compact, lightweight shape paired with aggressive styling cues.
Short overhangs, a sloping roofline, and wide wheel arches give it a sporty stance while still keeping the practical hatchback proportions.
Another defining feature is the performance-oriented detailing. Larger air intakes, sport bumpers, spoilers, and sometimes flared fenders.
When drawing, these are the elements that instantly separate a hot hatch from a regular hatchback.
Finally, wheels and stance play a huge role. Hot hatches usually sit lower to the ground and are fitted with bigger rims and wider tires.
Convey these in your sketch makes the car look more powerful, and ready to perform, while still maintaining its everyday usability.
So what else can you do with your Honda Civic drawing? You can try to paint it with paints, or trace it with an Inker to give it a more cartoon or comic look.
You can also take it to the next level and learn how to draw a BMW i8, the ultimate sports car form a German brand. Or learn how to draw a Ferrari, another king of fast and powerful cars, but at this time from Italy.


thank you so much this really helped me for my dream car drawing for my journal.👍😘
Glad it helped with your dream car drawing, that’s awesome.
liked this car
Thanks, happy you liked it.
its not a lambo xd
True, not a Lambo — still fun to draw though.
Mmmmm that’s an Honda Civic
definatley
This is definitely a Honda Civic here.
ty
will use to make the Red Bull RallyX car
Nice, using it for the Red Bull RallyX car sounds cool.
ooh can u make a honda insight
plz
Honda Insight is a good idea for a tutorial.