How to Draw an Audi A4
In this step-by-step tutorial, we will show you how to draw an Audi A4 – a car from one of the most famous companies in the world.
Previously, the team of Drawcarz had already shown how to draw an Audi R8 and some other models, but those cars were more sporty in nature.
In this instruction, we want to show a more familiar sedan car. Most of the Audi cars are made in this body, with the exception of cars with the Q letter in the name.

How to draw an Audi A4: step-by-step tutorial
Step 1 – Establish the Audi overall shape and position
Outline the general proportions of the Audi A4. Mark the cab, hood, and trunk, keeping the silhouette low and elongated, as is typical for a German executive sedan. Use very light lines so adjustments can be made easily. For an older model, keep the roofline taller; for a modern premium automobile, make it flatter and more aerodynamic.

Step 2 – Shape the sedan’s semicircular arches and lights
Sketch two symmetrical semicircles for the wheel arches. Add the outlines of the bumpers and lightly indicate the headlight and taillight above them. These features set the main visible details of a compact luxury car. To make it sportier, mark a small spoiler.

Step 3 – Draw the Audi A4 greenhouse
Outline the upper window frame, or greenhouse, with a smooth arch on top and a straight line at the bottom. Then mark the doors and windows. These simple lines define the side surface of the premium automobile’s design.

Step 4 – Complete the sedan’s windows and add the handles
Refine the windshield and rear window lines, giving them a smoother look. Draw simple handles on the doors, placing them slightly above the midline of the body. If drawing an older generation A4, you can sketch the handles as two simple rectangles.

Step 5 – Draw the central pillar and side mirror
Add the B-pillar to divide the side windows. Place a small antenna on the roof and sketch the rearview mirror on the front door. You may also show a fog lamp at the bottom front. Modern A4s often use sharp, angular mirrors, while earlier models had more rounded shapes.

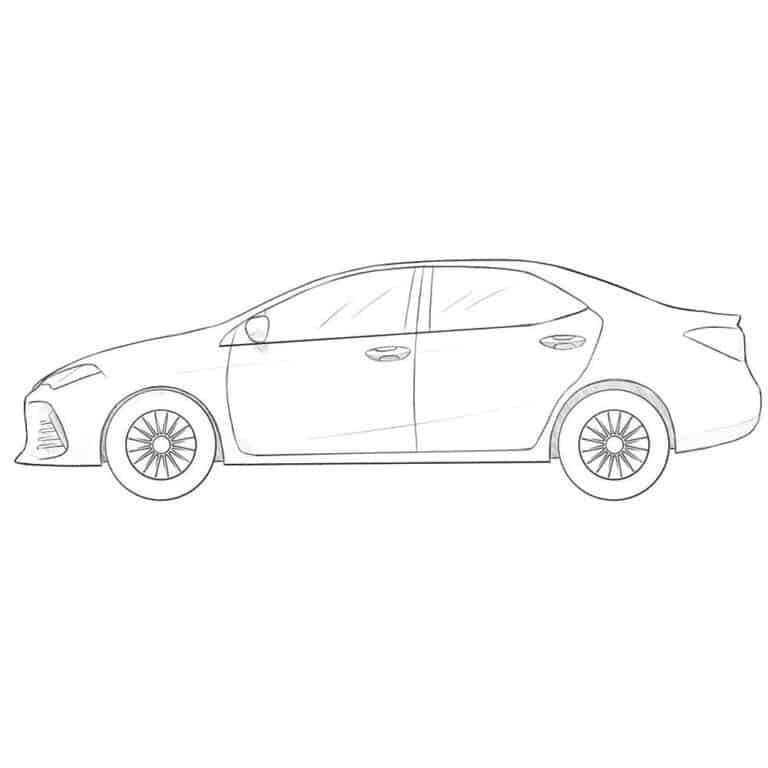
Step 6 – Draw the wheels and rims of your Audi A4
Depict the wheels as perfectly circular and add rims inside them. Check symmetry carefully, trying to give them a smooth look. In a sportier trim, the rims may be thinner and larger; in a standard version, smaller and more understated.

Step 7 – Indicate the rim spokes
Draw a small central circle in each rim, then extend spokes evenly toward the edge. Keep the spacing consistent, like rays radiating outward. A multi-spoke pattern suits a modern luxury sedan, while a simpler five-spoke design reflects an older or base model.

Step 8 – Add shadows and tonal gradients
Apply shading starting from darker areas under the arches, bumpers, and underside. Add midtones across the body and keep highlights on glass surfaces. Gradients make the compact luxury car appear more realistic and dimensional.

Continue practicing with Audi models
Add additional shading layers to make your Audi car look even more 3D and realistic. Make the areas of transition of light to shadow more contrast and do not forget about midtones. This will make your Audi drawing more convincing.
The Audi A4 has been in production for many years, and over that time it has gone through numerous redesigns, facelifts, and new generations.
With each update, new details were added to the exterior, stylistic solutions evolved, and the overall look of the vehicle changed.
By drawing the version shown in our tutorial, you now have the foundation to illustrate any other variation of the Audi A4 – whether it’s from a different year, a facelifted model, or even a performance-oriented RS version.
Simply follow the steps from this guide, use references from the internet, or rely on memory to recreate the outlines and details of the version you prefer.
It’s also very useful to study other Audi models, as they include many interesting design features worth practicing.
For example, you can visit our Audi A7 tutorial, where we show how to depict a sportier, more aggressive four-door coupe.
Another option is our Audi Q7 drawing lesson, in which the brand’s distinctive styling is applied to a full-size SUV.
Or you can take a different direction and check out our Audi RS6 tutorial, where we illustrate a performance version of the lineup in the form of a powerful sports wagon.
This lesson, like all of our tutorials, is created in the traditional pencil-drawing approach, using hatching and layered shadows to build volume.
But this is not the only way to finish your artwork. You can also color your car in any shade or combination you prefer.
And if you want to practice further and develop a stronger understanding of color and tone, make sure to visit our Audi coloring pages collection.
If you enjoyed this Audi A4 tutorial, subscribe to our free email updates to get new step-by-step car lessons delivered straight to your inbox.
Share this guide and keep practicing with our other tutorials to build your own collection of drawings across the entire Audi lineup.


🚗 my car is the red one
Very good idea to color a drawing and make it look unique.