How to Draw a Ford Tuscany
In this tutorial you will learn how to draw a Ford Tuscany, a special edition pickup truck that represents one of the boldest interpretations of the classic Ford design.
Ford has been producing pickup trucks for many decades, and they have become some of the most popular vehicles around the world.
The Tuscany version builds on this tradition, adding unique body elements, upgraded trim, and a more aggressive appearance that sets it apart from standard models.
This guide is essentially a continuation of the Ford truck drawing tutorial, and will cover points that were not covered in that main tutorial.

How to draw a Ford Tuscany: step-by-step tutorial
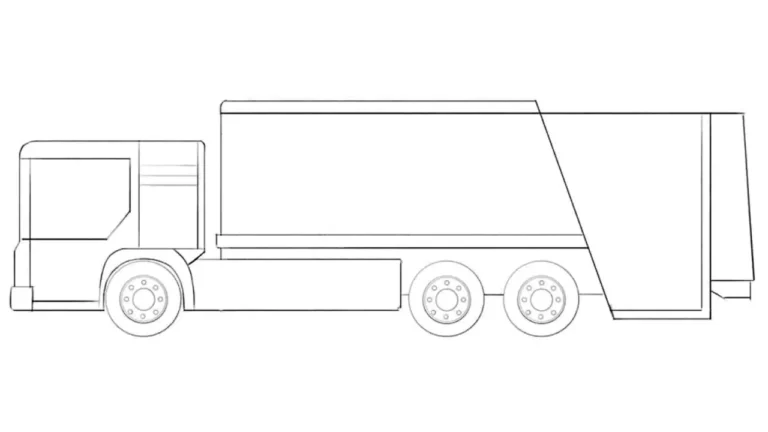
Step 1 – Create the cabin and cargo platform outline
The body of any pickup truck consists of the front part (cabin) and the rear part (cargo platform). In the first step, we need to sketch these details using very light liens. At this stage, it is very important to capture the overall shape and position of the truck.

Step 2 – Add the cabin glass, tires, and lights
As we said in the fundamental guide about how to draw a Ford truck, this company has unusual design for window frames and headlights. Block in the windows as an elongated and irregular rectangle, with a relatively low beltline typical of Ford’s pickups. The lights can be marked as irregular rectangles with a slight hint of internal divisions. The tires should be drawn as symmetrical circles.

Step 3 – Sketch the Ford Tuscany doors, bumpers, and arches
Doors and bumpers on Ford pickups also look quite standard. Lay in the door shapes with long vertical and horizontal strokes, forming simple rectangles. Indicate the bumpers as horizontal bars projecting forward and backward, and outline the arches as curved contours that echo the wheels.

Step 4 – Trace the Ford Tuscany headlight and bumper
The loose sketch drawn in the previous steps should be turned into a full-fledged illustration. To do this, will gradually trace all the details, starting from the front. Strengthen the outlines with darker strokes, especially around the headlights, giving them a solid presence. Reinforce the lower bumper line with a thick contour. Use confident, uninterrupted lines here.

Step 5 – Refine the pickup roof and windows
Next, trace the upper part of the cabin, which consists of the roof, the upper part of the doors, and windows. First, detail the roof as a straight horizontal shape with smooth edges. Divide the window area into individual parts with vertical pillars. Add the side mirror as a projecting rectangular form.

Step 6 – Finish drawing the Ford Tuscany cab
In this step, we’ll finish tracing the Tuscany cab. Clarify the vertical divisions of the doors and mark the handles with simple horizontal blocks. Add the step board along the bottom of the cabin – a long rectangular strip that runs between the wheel arches.

Step 7 – Draw out the Ford Tuscany cargo platform
The last detail of the body, but it is probably the most important for any pickup truck – the cargo part. Define the bed with strong, clean horizontal and vertical lines. Draw out the Ford Tuscany taillight as a vertical rectangle at the rear edge. Also, trace the rear wheel arch and erase the guidelines.

Step 8 – Define the strong tires and add simple rims
The wheels of trucks are often purely utilitarian so that they have a fairly powerful tread pattern and a simple rims pattern. Convey the volume of the tires by outlining them with heavy, bold strokes. Within each wheel, sketch a simple rim design such as five or six straight spokes radiating from the hub. Also, you can illustrate the tread by adding short angled marks along the sidewalls.

Step 9 – Show reflections and shadows to the parts
To complete your Ford Tuscany drawing, add some shadows to make the truck look real and voluminous. Add shading under the chassis, in the wheel wells, and beneath the bumpers. Add some simple hatching on the glass of your truck to simulate reflections.

Ford Tuscany design features
This is actually one of the many trucks that Ford makes. We made it so that using the steps from this drawing guide you can sketch any other pickup of this and any other company.
The Ford Tuscany has been offered in several variations, each with its own design accents.
Some versions are based on the F-150 platform with lifted suspensions, oversized wheels, and aggressive off-road styling.
When sketching these, it’s important to exaggerate the ride height. Also you can show the deep tread pattern on the tires to convey their rugged look.
Other editions are more luxury, with chrome detailing, smoother body lines, and unique trim packages.
To make your illustration more unique, you can experiment with custom features often seen on Tuscany models.
For example, you can add details like hood scoops, fender flares, or auxiliary lighting bars to highlight performance.
Distinctive paint schemes, decals, or even a personalized badge can also give your version of the Ford Tuscany a more individual character. Also, you can draw a ford logo on the rim hubs.
By trying different approaches you can practice how variations in design details completely change the look of the same vehicle.


i like this truck
Thanks, Vineeth! Glad you liked this truck drawing tutorial
Cool
Thanks!
really fun
Great to hear that, Kyle.
cool
Thanks, Kyle! Appreciate the feedback.