How to Draw a Tesla Model X
Time goes forward, the evolution of the automotive industry has brought electric vehicles to the forefront, and to contribute to the promotion of electric vehicles, DrawCarz will show you how to draw a Tesla Model X.
All stages of this Tesla Model X tutorial will be the very simple, and in the very end, you will get a really detailed and dimensional electric car drawing.
This tutorial continues our collection of Tesla car drawing tutorials, showing how to sketch one of the most popular models.

How to draw a Tesla Model X: step-by-step tutorial
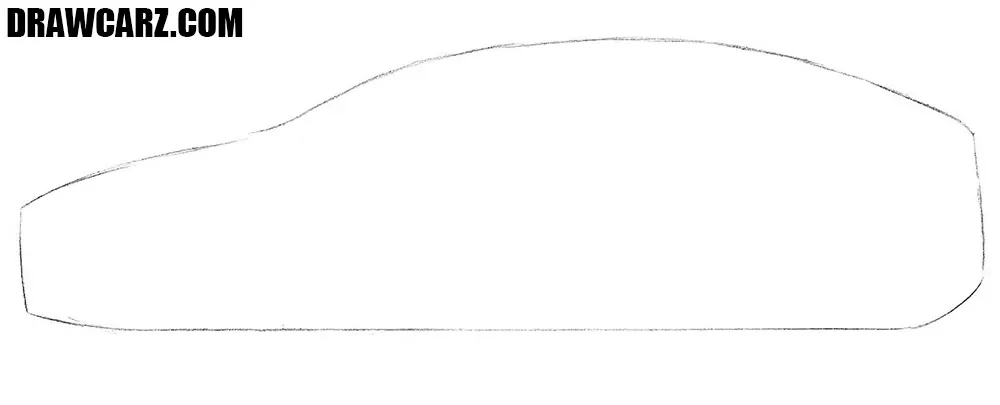
Step 1 – Define the electric SUV body proportions
All cars, whether new or old, start with a frame, and this guide is no exception. So, use both smooth and rough lines to sketch the electric car’s silhouette. Create the long wheelbase with its cabin-forward shape. Pay attention to proportions, the Model X is tall yet sleek.
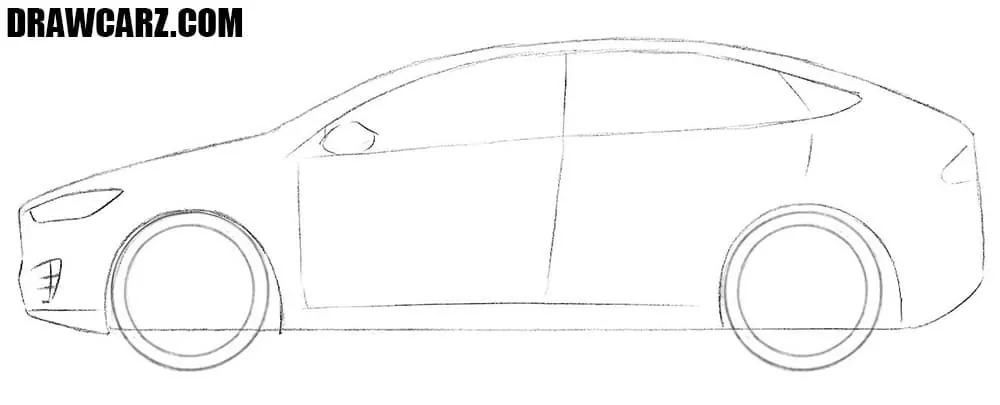
Step 2 – Sketch the main details of your Tesla Model X
In this step, we’ll add the most basic and essential details. Draw two identical circles to form the base of Tesla Model X wheels. Add the outlines of the headlight and taillight – both narrow and horizontal. Sketch a single arc across the cabin to indicate a continuous window line, thin and elongated.

Step 3 – Add rim detailing, doors, and side mirror
Continue adding details, and sketch the rims, placing them inside the tires. These simple outlines should mirror each other and have perfectly round shape. Lightly draw the doors of your Tesla Model X with rough strokes. Divide the glass area into window sections. Add the mirror as a simple polygon emerging from the A-pillar.

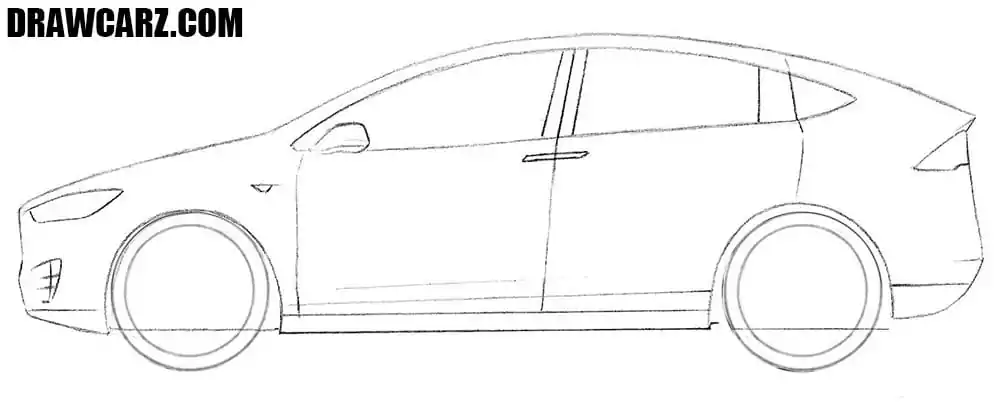
Step 4 – Detail the front bumper of the Tesla Model X
The electric SUV base is ready, and from this stage we’ll begin using sharper lines. Start with the “nose”, detailing all the details and defining the bumper section. Strengthen the hood with crisp contour lines. Trace the headlight of the Model X with smooth, tapered shapes. Below it, sketch a barely noticeable lower air intake – electric car design minimizes openings in the grille.
Step 5 – Trace the panoramic roof arc and windows
Here, use smooth lines to trace the sloping roof, making it continuous and fluid, almost like a single brushstroke. Make the window trim thin, detail the pillars, adding more vertical lines. Refine the mirror, giving it crisp contours. Finally, erase the guide lines from the cabin area to clean up this part.

Step 6 – Define the aerodynamic back with the taillight
Now let’s do the same thing, but with the rear of our electric car. Carefully outline the rear of the electric SUV to create smooth contours of the trunk and bumper. In this same step, create the distinctive shape of the taillight. Use very smooth lines and transitions to convey the iconic shapes of the electric car.

Step 7 – Draw the Tesla clean doors with hidden handles
Use beautiful, clean lines to trace the doors. Add recessed handles as small horizontal lines, flush with the bodywork – a key element of the electric car design. Also, you can add a few horizontal decorative lines. Erase all remaining sketch lines and leave only the SUV’s clean, seamless side details.
Step 8 – Draw the aerodynamic Tesla rim patterns
Now let’s add the rims of this beautiful electric car. First, mark the center sections, the hubs of the rims. Illustrate turbine-like patterns on the rims, sketching thin spokes that curve evenly outward from the hub. If everything is correct, move on to the final step.

Step 9 – Add reflections and shading for 3D appearance
It’s time to add some volume and make the electric car look more realistic. To do this, use hatching and short lines to illustrate shadows and highlights. Shade the bottom edges of the planes and inner areas of the arches. These will be the darkest places of the car body. On the side panels and windows, use long horizontal hatching to convey subtle reflections.

Other Teslas to draw after the Model X
Tesla’s design language is consistent across the lineup, but each model interprets it in a slightly different way. After practicing with the Model X, you can look at other cars of this brand to understand how the design features adapt to sedans and sports cars.
In our Tesla Model S drawing tutorial, we illustrate the brand’s flagship sedan. Its clean lines and minimalist proportions set the tone for Tesla’s entire lineup and gave electric sedans a premium image.
The Tesla Model 3 drawing tutorial shows the smaller sedan that brought the minimalistic electric car design language to a wider audience. Its compact body and very smooth shapes make it a perfect contrast to the larger Model X.
The Tesla Roadster drawing guide is a pure sports car with iconic smooth and futuristic electric car outlines. This car shows how the same design philosophy can be applied to performance vehicles.
Do you like electric cars? What cars would you like to be able to draw? Write your opinion in the comments below.
Want to keep up with our new car drawing tutorials? Follow us on social media and join our free email list to get fresh lessons right in your inbox.


trash
Noooooooooo
l like this draw tesla model x
Thanks, Afsana. Glad you liked the Tesla Model X tutorial.
This was good
Thanks for the feedback!
I love teslas
My favourite.
Happy to hear this one is your favorite!
Me too, Kendrick, Teslas are great cars.
you are amazing
Thank you, Maria!
Ok who didn’t know that Tesla x was an S.U.V?😑👉🤭👉😄👉🤣👉🤪
noone
Yes, Tesla Model X is actually an SUV.
The best
Thanks a lot!
i love tesla’s even tesla model X
same das my dream car
That’s a great dream car, Jonas.
Glad you like Teslas too, Elijah!
Cool
Thanks, Peter.
I am not that good at drawing but now i am
That’s awesome, Jack. Keep practicing!
tat is good
Thanks, Abdul.
Nice
Thank you!
eeee
this car drawing tutoria is well planned
Thanks, Ibrahim. Glad you found it well planned.
do a tutorial for Porsche Panamera 2010, please
Good idea, lemon. Porsche Panamera 2010 would be interesting to draw.
i love it
Thanks, kingja!
im so trash at drawing now i am good i recomend this web-site im only 11 going to grade 6 soon thank you so much drawcarz
That’s great to hear, Bubba! Keep going and you’ll get even better.
i wanna have kids with you drawcarz:)