How to Draw a Mazda MX-5
Learning how to draw a Mazda MX-5 is the focus of this lesson. The MX-5 is a roadster that always draws attention, and driving this compact convertible makes it hard not to feel positive emotions.
In this tutorial, we’ll go through the steps together and show you how to sketch the proportions and distinctive details that make the this compact Japanese convertible such an iconic model.
We will also share visual techniques for illustrating small yet powerful cars, along with design approaches that professionals often use for this type of vehicle.

How to draw a Mazda MX-5: step-by-step tutorial
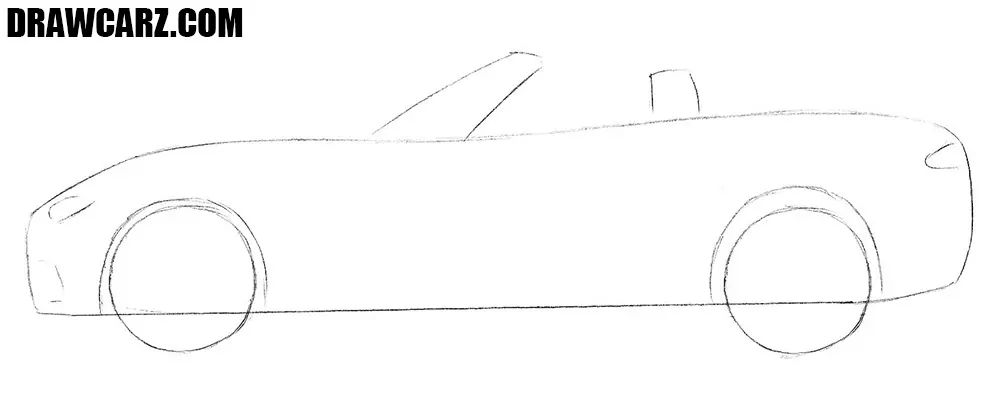
Step 1 – Outline the base silhouette of the MX-5
The Mazda MX-5 is a compact and lightweight vehicle. In the first step, sketch the body as a simple outline with a protruding windshield and seat. Try to give the car the appearance of a compact roadster. The hood should be sketched longer compared to the short rear part.

Step 2 – Sketch the main exterior details
Each car has essential parts that cannot be omitted: tires, arches, and lamps. Display them using loose lines. First, sketch two large rounded arches that will house the wheels. Next, draw the wheels of your Mazda MX-5. After that, add the simple lamp shapes.
Step 3 – Draw in detail the front of the Mazda MX-5
This Japanese sports car does not have a large number of complex lines, so it will be easy to detail this part. Trace the front of the vehicle, outlining the bumper and smoothing the shapes. Then trace the oval-shaped headlight more carefully.

Step 4 – Draw the windshield and visible seats
This sports car is produced in a roadster body style without a roof. Sketch the windshield and the visible parts of the seats. Inside the cabin, lightly draw the seat headrest, visible from this point. Add the side mirror near the edge of the windshield. Erase construction lines that cross into the cabin area so the upper part of the sketch looks clear.

Step 5 – Detail the rear section of your Mazda MX-5
The rear of the Mazda also does not have a large number of complex lines and details, so it is fairly easy to illustrate. Outline the short trunk with clean lines, giving it a flat upper surface. Add the taillight, making it small and horizontal. Finalize the rear bumper and mark the rear wheel arch more clearly so the entire back looks finished.

Step 6 – Draw the long coupe door and handle
Most coupes have two doors (unless it is a four-door coupe like the Audi A7). In this step, draw out the door and handle of the MX-5. Trace the outline of the single coupe door, making it long. Place the handle just below the beltline.

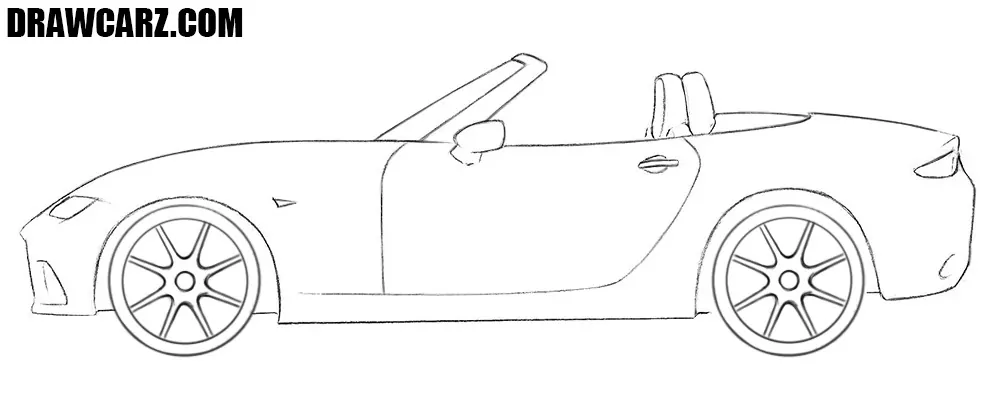
Step 7 – Add the basic spoke patterns to the wheels
We decided to keep the sports car’s design simple, so the rims have an uncomplicated pattern. Inside each wheel, sketch a central hub and extend several straight spokes outward evenly. If you want to reflect the MX-5’s real look, five or six spokes will work well.
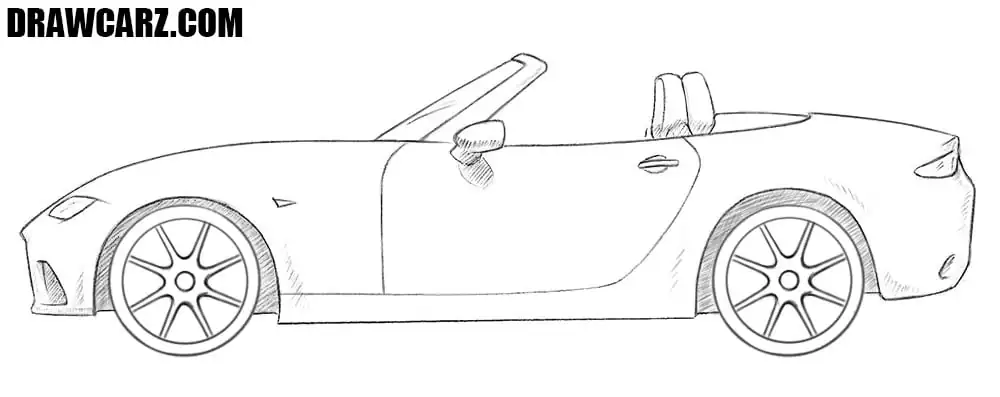
Step 8 – Add shadows and highlights with hatching
Simple hatching will make your Mazda MX-5 drawing look more natural and dimensional. Apply shading beneath the car’s body, under the bumpers, and inside the wheel arches. Use diagonal hatching for the windshield and windows to represent glare.
MX-5 variations
And now our readers know how to sketch a Mazda MX-5, a compact Japanese sports car that has earned iconic status.
In this lesson, we did our best to highlight the most important nuances of drawing this compact Japanese sports coupe, showing how automotive artists translate design ideas and stylistic choices onto paper.
The Mazda MX-5 has gone through several generations, each with its own unique look, and practicing them will help you understand how automotive design evolves over time:
- NA (1989–1997): Recognizable by its pop-up headlights. Keep the body compact, wheel arches rounded, and lines soft. Simplicity is key.
- NB (1998–2005): Similar in size but with fixed oval headlights. Pay attention to the slightly sharper nose and more modern bumper shapes.
- NC (2006–2015): Larger and more muscular. To sketch it, demonstrate a taller profile, wider shape, and more pronounced curves around the fenders.
- ND (2016–present): Sleek and modern. Has slim, aggressive headlights, more detailed hood, and strong side lines.
Each generation requires its own approach to proportions and detailing, but the spirit of the MX-5 should always remain at the center of your sketch.
Japanese sports car sketching
We especially enjoy working with coupe and convertible body styles, particularly when it comes to premium or performance models – and that’s no coincidence.
These vehicles represent the pinnacle of automotive design and engineering, and as enthusiasts we find constant inspiration in them, sharing that inspiration with you through our step-by-step guides.
That’s why we already have many lessons dedicated to coupes and performance cars.
In our Mazda RX-7 drawing tutorial, we show how this model became a JDM legend through its unique design. Sketching its silhouette helps you understand why the RX-7 still influences modern sports car styling.
The Toyota Supra drawing tutorial shows why this car is considered one of the cornerstones of Japanese performance culture.
And in our sports car drawing tutorial, you can apply the same core principles to other high-performance vehicles. These lessons will give you a stronger grasp of design across different brands.


Уоу, я ещё не наоисовал. Но нарисую!
What?
I have no idea what that man just said
The comments is saying they will try to draw it later.
I hope your drawing practice was successful with our tutorial!